

This is a re-post I did a guest author for Tim over at the Revit Add-ons Blog.
FenestraPro – Energy Analyses and Facade Design in One Powerful Revit Add-on.

FenestraPro was born when co-founders David Palmer and Simon Whelan saw a need.
“It was through our own practice and research that we recognized the requirement a software or tool that allowed Architects to design energy efficient building and facades to achieve the required performance without compromising the aesthetic of the facade”.
- Simon Whelan, Co- Founder / COO
The real goal of FenestraPro is to allow the Architect to have control over the facade design from an early stage of design through to completion. This goal can be seen right on the FenestraPro landing page, with the mantra: “Improve Your Design, Reduce Time & Maintain Aesthetic Control,” along with the accompanying graphic:

This is well and good, but how does the latest version – FenestraPro Premium 3.1 for Revit – work?
One of the first things I noticed about FenestraPro was that it was one of the most “fully baked” add-ins I’ve seen. It’s like a full-on a separate program that is capable of doing a tonne of stuff, all nicely packaged into one button inside of Revit.
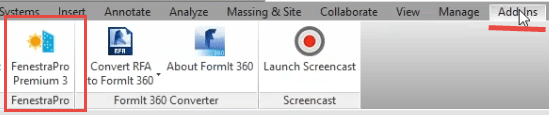
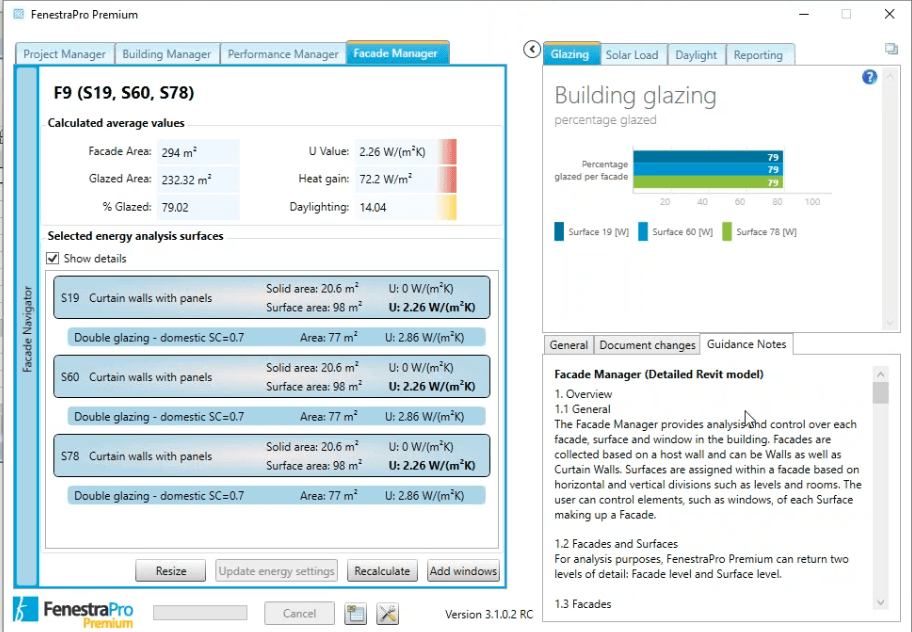
Now don’t let my comment about “one button” fool you, once you click that button the full dialogue box pops up on your screen and you are off to the races.

And if that’s not enough for you – and really don’t we all want a little more? – if you hit the “flyout” icon in the top right corner of the dialogue box, you get even more FenestraPro awesomeness!
Now that we know FenstraPro is the little button on your Revit Add-Ins tab that packs a punch, let’s find out what kind of knockout power it really has.
What it does
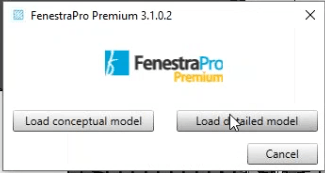
This Add-on works, generally speaking, with three aspects of energy analysis: Daylighting, Solar and Thermal. It can do this on both conceptual mass models and detailed models, you choose which version you will be working with when you begin your FenestraPro session.
Conceptual model
The Conceptual model process is done early in a project when you’re dealing with a schematic or conceptual design in a massing form.
A typical question that comes up during conceptual design is: What’s my wall to window ratio? Well, this is a question that the massing tool within FenestraPro can do a really good job of answering, and in an easy to use interface too.

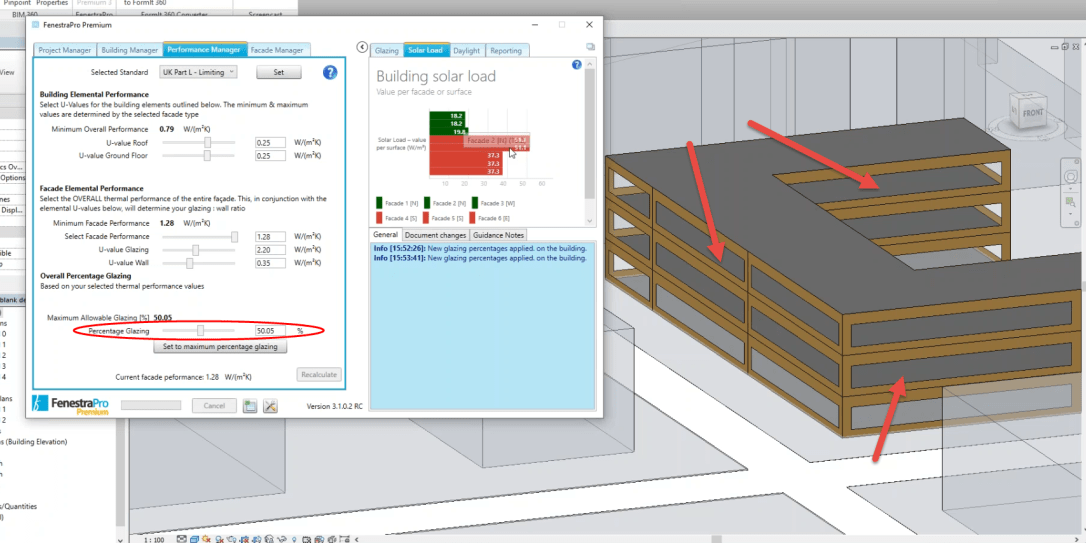
When dealing with the conceptual massing element in Revit, what FenestraPro does is deal with the “Form factor of the building,” or the ratio between the volume and the surface area of the envelopes.
As you’re doing these design studies, you can also choose your required standard from a drop-down menu so you are designing to the proper requirements.

One of the cool features is that with this add-in you can actually change your energy calculations and then apply them to the Revit model, and they will be written to the project.
As well as adding percentage glazing to the model, the add-in can also create shading devices and write them to the Revit model.
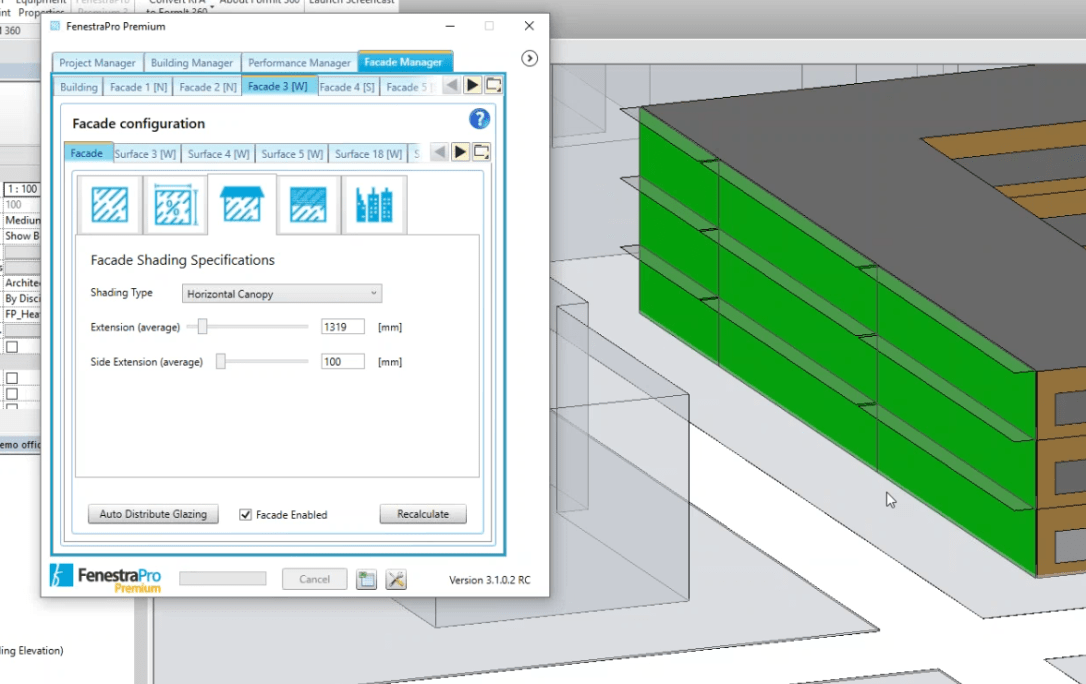
These processes can be done on a complete model, or you can drill down and do it on a panel-by-panel basis.
Detail model
The detail model option is for when you are further along in your project and are working with an actual Revit model, and no longer dealing with conceptual masses. Another nice feature is that, along with the add-in, you get a library of FenestraPro windows for when you are working in the detailed modeling environment. While there are many things that can be done while working with the detailed model process within FenestraPro, I will talk about two of my favorites.
Snapshot feature

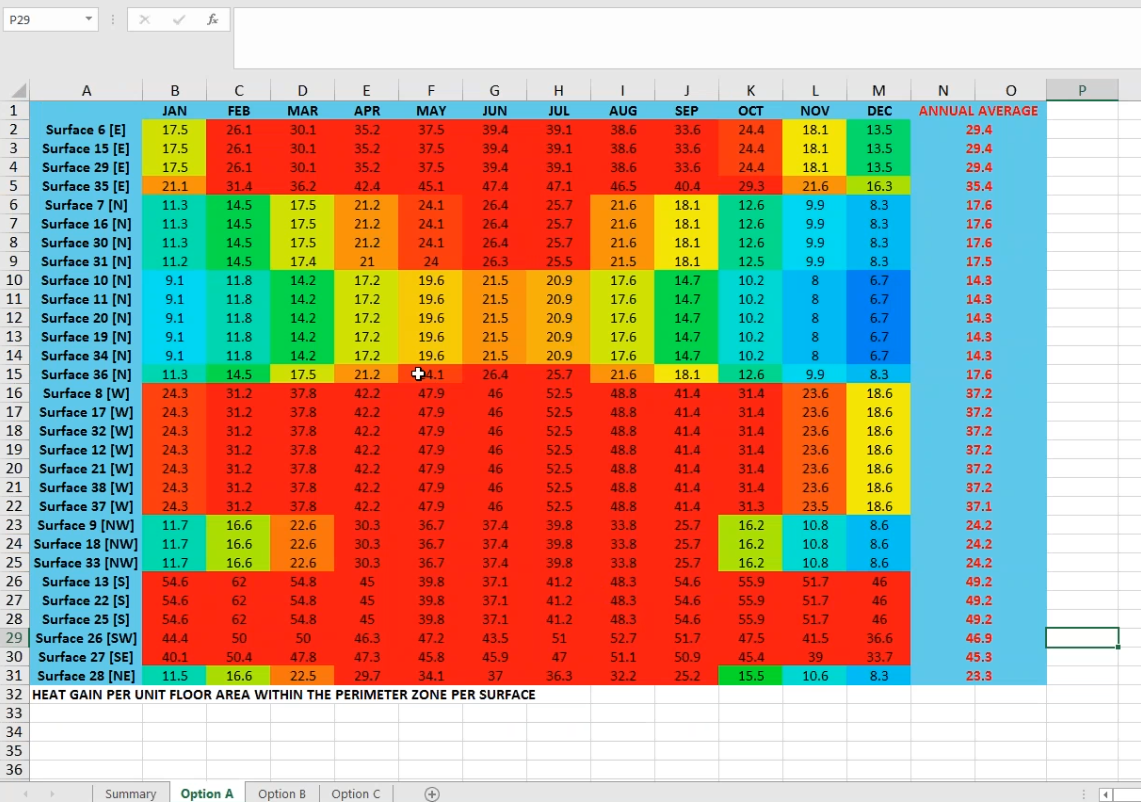
Once you have created your initial “Snapshot,” an excel spreadsheet is created. This spreadsheet will have some basic project information in it as well as the current state of your projects façade energy analysis.

Then every time you hit that snapshot icon after that it will create a new iteration of the Project, or a particular building, or just a facade. Each of these new options will appear in that original excel workbook as a new worksheet.

As you navigate to these workbook tabs, you will see what effects your changes have had on your project, in an easy to read colored chart.

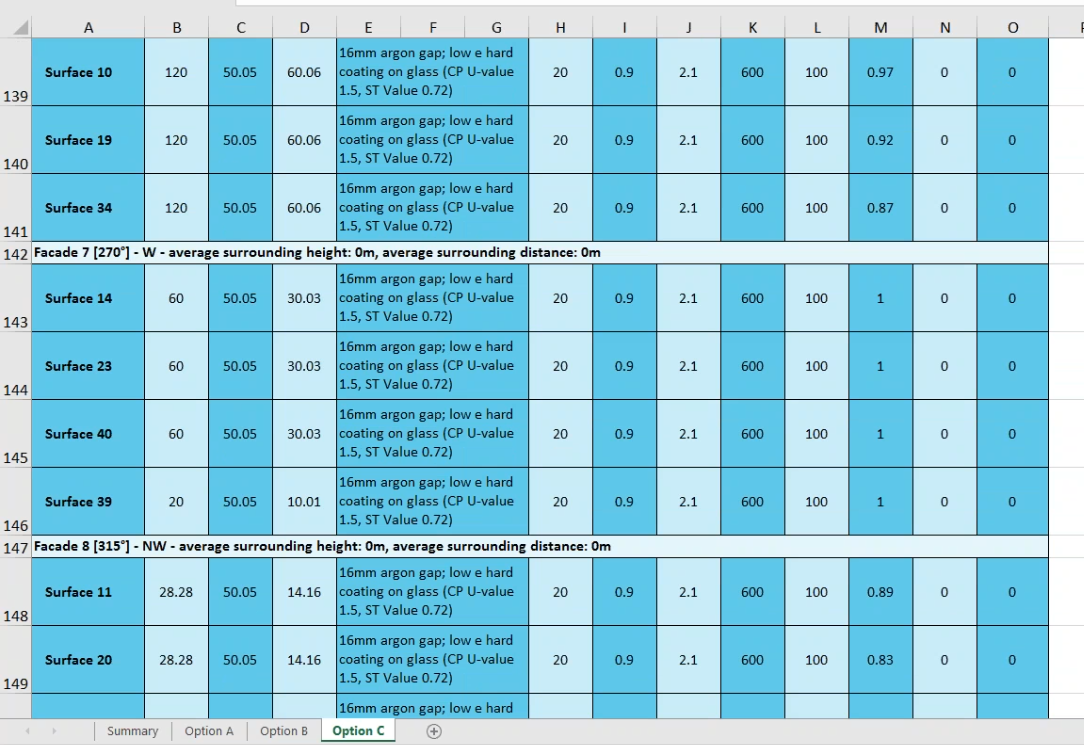
Each option also comes with a plethora of additional information to make sure you are making the best-informed decision possible.

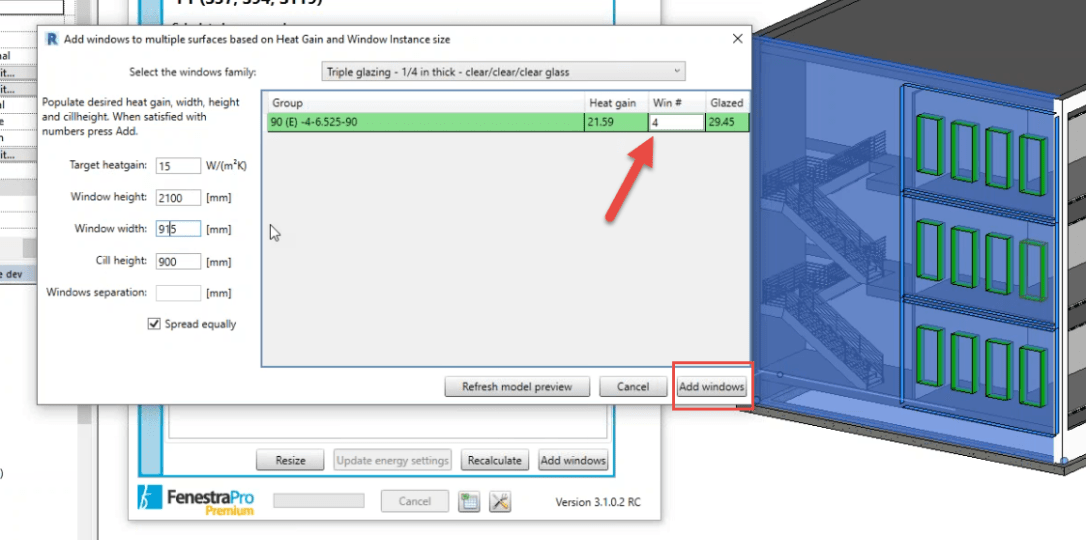
Generative Design
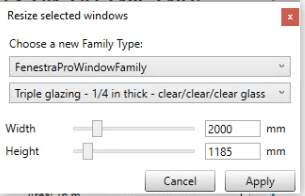
One of the newest features is the ability to use FenestraPro to do some Generative Design (albeit somewhat rudimentary at this point) within your project. This all begins with the FenestraPro window families that come with the add-in. When you use those windows in your project, they allow you to adjust the size of the windows on the fly with a slider.
Then gets a little more advanced by selecting an area (façade) within your project. From here you input your “rules” for the façade you are working on.

Then you click the “Add windows” button to see what happens.

Don’t like what you see, either from a visual or analytic standpoint? You can change your settings, for example, from 3 to 4 windows and then click the “Add windows” button again.
Resources
When you purchase Fenestra Pro Premium, along with the add-in you also get training on how to use the program. While this 2-3 hours of training will help with the picks and clicks of the app, it also focuses on the best practices around Revit modeling itself in regards to energy analysis, including:
- Room bounding elements
- Creating rooms with the correct limits
- Dealing with linked models
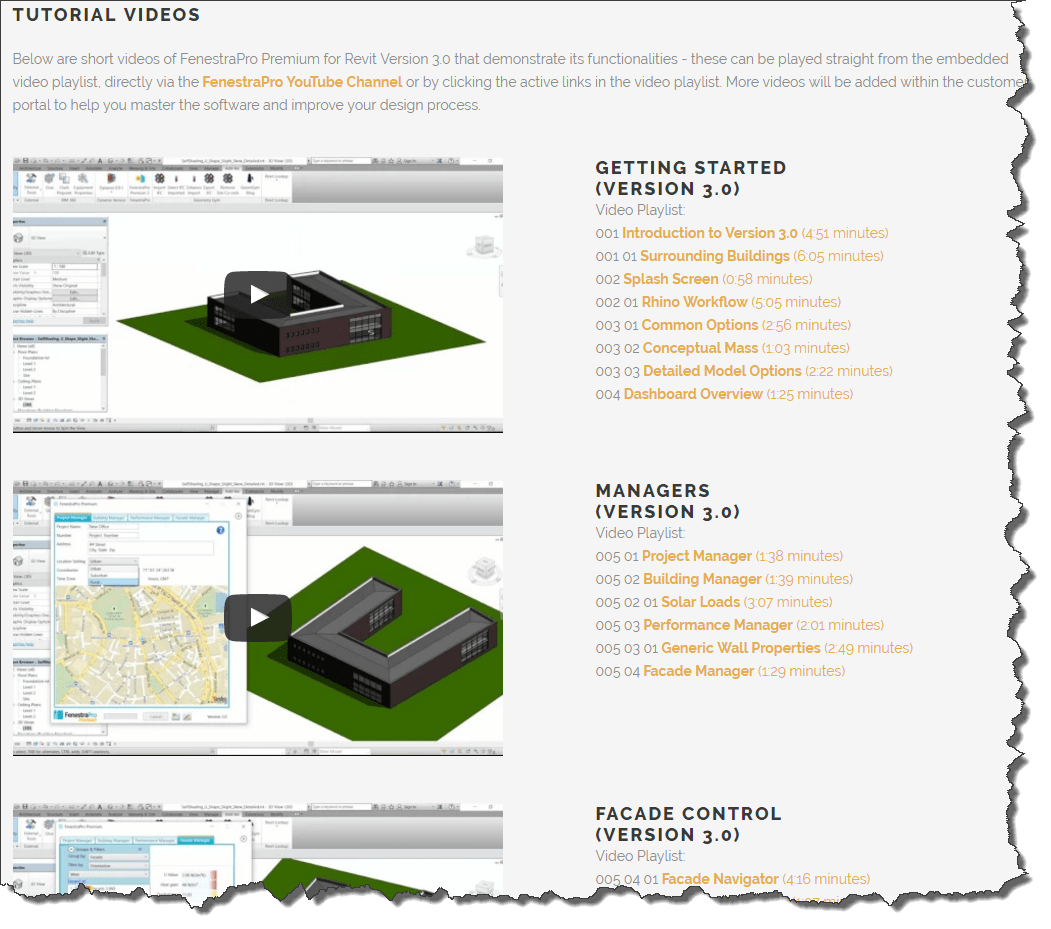
You can also find lots of quick videos to help you on your way at www.fenestrapo.com site under the “User Support” tab.
You can also get some help from your local FenestraPro reseller, you can find them under the “Reseller” tab on the FenestraPro website. As an example, initial.aec has some great video content for FenestraPro on their YouTube channel.

Conclusion
FenestraPro Premium is a feature rich solution to a problem that has yet to be fully addressed by Autodesk, and would be a great addition to any Energy analysis workflow. While some of the newer features like Generative Design may not be at an endpoint yet, they are clearly a step in the right direction, a sign of forward-thinking, and of what great things may be yet to come from FenestraPro.
FenestraPro Premium is priced at €100 per month per user.
Note: If you do have a need for more users, an enterprise option is available that provides access to floating network licenses of FenestraPro Premium.
Now go request a trial and check it out for yourself.
Until next time,
![]()
Twitter: @theBIMsider
Facebook: theBIMsider
LinkedIn: Carl Storms
Podcast: The Simply Complex Podcast
